Reaper Miniatures produces a
massive range of highly detailed and affordable miniatures through its Bones
line of plastic miniatures. In this post
I will show how Reaper Bones Miniatures could be used to build a
Werewolves Horde (Undead Army) for Mantic Games’ Kings of War.

I
originally purchased 77009: Werewolf to represent one of my Manimals for my
Mutant Crawl Classics’ Fan Site
Werewolves Horde: A Werewolves
Horde consists of 6 large infantry models (40mm square base) comprising an unit
footprint of 120mm wide and 80mm deep (3 models wide, 2 models deep).
The Miniatures: The
miniatures I selected for this project are 77009: Werewolf (x5) and 77464:Werewolf (x1). Models 77009 represent my rank-and-file werewolves and model
77464 represents my unit leader (champion). The bases
I used for this unit are Reaper Miniatures’ 74024: 40mm Square Plastic Base.

The rank-and-file werewolves (77009: Werewolf)

Unit Leader/Champion (77464: Werewolf)
Unit Costs: The
models and bases for this unit costs less than $20 USD ($25 to $26 in Canadian
dollars). Specifically, each
rank-and-file werewolf costs $2 USD apiece, the champion $3.79 USD, and a 10
package of 40mm bases $5 USD. The affordability of Reaper Bones provides great army building options for a wargamer on a budget.
Preparing
the models
Correcting Bent Figures:
Every so often a Reaper Bones figure will be bent in an odd direction. It’s easy to fix this by placing your Bones
miniatures in a small bowl of hot water for a few miniatures. After removing the figures from the hot
water, they usually return to their intended shape (somethings you
may need to hold the figure for a few minutes in the intended position while the figure sets).

The models ranked up in an unit
Ranking up the Miniatures: Before
gluing the miniatures onto the bases, I arranged the miniatures in their horde formation
(3 bases wide, 2 bases deep). By doing
this I discovered that I had to adjust the position of the unit leader on its
base to make enough room for the werewolf behind it. Thus, I had to trim parts of the Bones base
to allow the leader to sit in a more forward position on its base.
Bases: I
used some masking tape to fill over the ‘slots’ in the bases and super glued
the miniatures on to the bases. Since
the lead werewolf’s base was quite thick, I used some epoxy putty (green stuff)
to create a transition from the Bones’ base to the square base. When the super glue and epoxy putty have dried,
I applied modelling sand to the bases with watered down PVA glue (white glue).

A black undercoat (black paint) has been applied to the unit
Painting
the Models
Black undercoat: I
applied an undercoat of black paint to the miniatures.

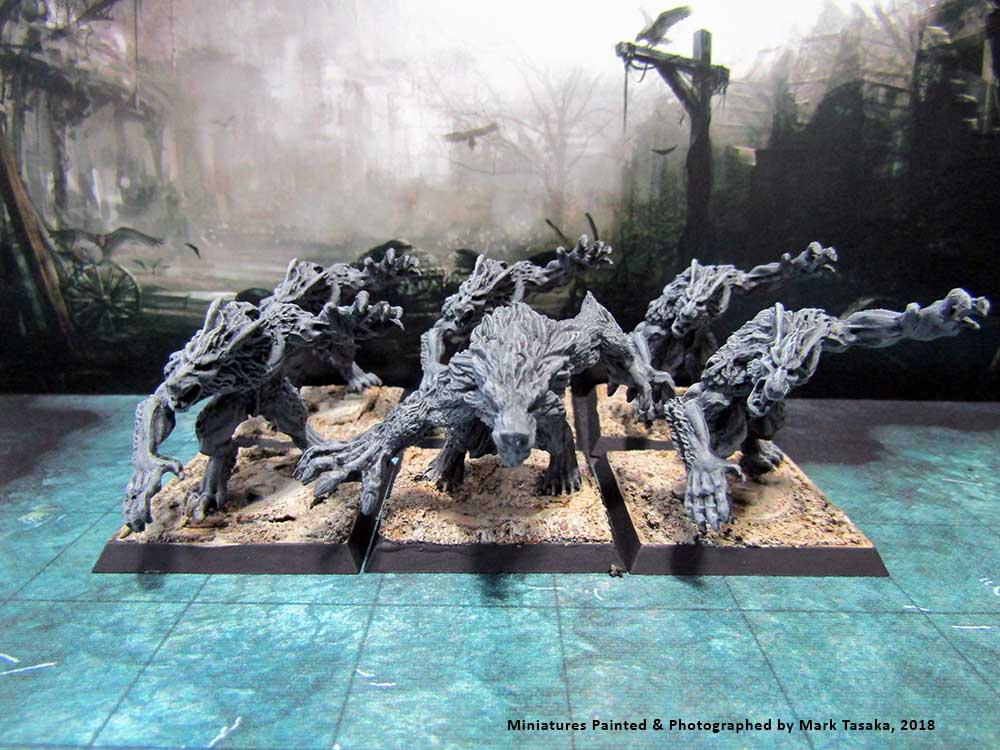
A grey base coat has been applied to the unit
Grey Base coat: Next,
I applied a grey base coat to the miniatures.

Ink has been applied to the miniatures
Black ink:
When the base coat dried, I applied black ink to the miniatures.

Ink has been applied to the miniatures
Dry brushing: Once
the ink dried, I dry brushed a lighter shade of grey paint over the
miniatures (this brings out the texture and details in the werewolves’ fur).
Painted bases
Bases: I following
a similar process to painting the bases: I started off applying a base coat,
then ink and dry brushed the bases.
In
Part 2 I will be added the fine details to the werewolves, getting the unit
ready for the tabletop.


No comments:
Post a Comment